快速开始
快速开始
1. 部署
1.1 环境准备
1.1.1 安装Docker
1.1.2 安装golang
版本要求1.22
安装Go语言环境相对简单,以下是在不同操作系统中安装Go的步骤:
1.1.2.1 在Windows上安装Go:
- 下载Go安装包:
- 访问Go官方下载页面:https://golang.google.cn/dl/
- 下载对应Windows系统的安装包,例如:
go1.22.2.windows-amd64.msi
- 安装Go:
- 双击下载的安装包,启动安装程序
- 遵循安装向导的指示,默认安装路径为
C:\Go - 完成安装后,安装程序会自动设置环境变量
- 验证安装:
- 打开命令提示符(cmd)
- 输入
go version,如果看到Go的版本信息,说明安装成功
1.1.2.2 在macOS上安装Go:
- 下载Go安装包:
- 访问Go官方下载页面:https://golang.google.cn/dl/
- 下载对应macOS系统的安装包,例如:
go1.22.2.darwin-amd64.pkg
- 安装Go:
- 双击下载的安装包,启动安装程序
- 遵循安装向导的指示,默认安装路径为
/usr/local/go - 完成安装后,安装程序会自动设置环境变量
- 验证安装:
- 打开终端(Terminal)
- 输入
go version,如果看到Go的版本信息,说明安装成功
1.1.2.3 在Linux上安装Go:
- 下载Go安装包:
- 访问Go官方下载页面:https://golang.google.cn/dl/
- 下载对应Linux系统的安装包,例如:
go1.22.2.linux-amd64.tar.gz
- 安装Go:
- 打开终端
- 解压安装包到指定目录,例如:
sudo tar -C /usr/local -xzf go1.22.2.linux-amd64.tar.gz - 设置环境变量,将以下内容添加到
~/.bashrc或~/.zshrc文件中:export PATH=$PATH:/usr/local/go/bin export GOPATH=$HOME/go - 保存文件后,执行
source ~/.bashrc(或source ~/.zshrc)使环境变量生效
- 验证安装:
- 在终端输入
go version,如果看到Go的版本信息,说明安装成功 安装完成后,你可以通过运行go env来查看Go的环境配置。此外,为了更好地使用Go,你可能还需要配置GOPATH,这是你的工作空间目录,用于存放Go代码和第三方依赖。
- 在终端输入
1.1.3 安装nodejs
版本要求18.6
安装Node.js的步骤因操作系统的不同而有所差异。以下是在Windows、macOS和Linux上安装Node.js的通用指南。
1.1.3.1 在Windows上安装Node.js:
- 下载Node.js安装包:
- 访问Node.js官方下载页面:https://nodejs.org/en/download/
- 下载适合Windows系统的安装包,通常会有LTS(长期支持版本)和Current(最新版本)两个选项,推荐下载LTS版本。
- 安装Node.js:
- 双击下载的安装包,启动安装程序。
- 遵循安装向导的指示,默认安装路径通常是
C:\Program Files\nodejs\。 - 安装过程中,请确保“Add to PATH”选项被勾选,这样会自动将Node.js的执行路径添加到系统环境变量中。
- 验证安装:
- 打开命令提示符(cmd)或PowerShell。
- 输入
node -v和npm -v,如果看到Node.js和npm的版本信息,说明安装成功。
1.1.3.2 在macOS上安装Node.js:
- 下载Node.js安装包:
- 访问Node.js官方下载页面:https://nodejs.org/en/download/
- 下载适合macOS系统的安装包,推荐下载.pkg格式的安装包。
- 安装Node.js:
- 双击下载的.pkg文件,启动安装程序。
- 遵循安装向导的指示,完成安装。
- 验证安装:
- 打开终端(Terminal)。
- 输入
node -v和npm -v,如果看到Node.js和npm的版本信息,说明安装成功。
1.1.3.3 在Linux上安装Node.js:
在Linux上,可以通过包管理器来安装Node.js。以下以Ubuntu为例,使用apt包管理器安装Node.js。
- 更新包列表:
- 打开终端。
- 输入
sudo apt update,然后按Enter键。
- 安装Node.js:
- 输入
sudo apt install nodejs npm,然后按Enter键。 - 确认安装并等待安装完成。
- 输入
- 验证安装:
- 在终端输入
node -v和npm -v。 - 如果看到Node.js和npm的版本信息,说明安装成功。 注意:在某些Linux发行版上,通过包管理器安装的Node.js可能不是最新版本。如果你需要最新版本的Node.js,可以考虑使用nvm(Node Version Manager)来管理Node.js版本。 安装完成后,你可以使用npm(Node Package Manager)来安装和管理Node.js的第三方包。
- 在终端输入
1.1.3.4 nvm
使用nvm(Node Version Manager)在Linux上安装Node.js可以让你轻松切换不同版本的Node.js。以下是在Linux上使用nvm安装Node.js的步骤:
- 安装nvm:
- 打开终端。
- 使用curl或wget命令来安装nvm。以下是以curl为例的命令:
curl -o- https://raw.githubusercontent.com/nvm-sh/nvm/v0.39.1/install.sh | bash - 或者,如果你使用的是wget,可以使用以下命令:
wget -qO- https://raw.githubusercontent.com/nvm-sh/nvm/v0.39.1/install.sh | bash - 安装脚本会克隆nvm仓库到
~/.nvm目录,并添加nvm源到你的shell配置文件中(通常是.bashrc、.zshrc等)。
- 配置nvm:
- 安装脚本执行后,你可能需要重新加载你的shell配置文件或重新打开终端。
- 可以通过输入
command -v nvm来检查nvm是否已正确安装。
- 使用nvm安装Node.js:
- 输入
nvm install node来安装最新版本的Node.js。 - 如果你需要安装特定版本的Node.js,可以使用
nvm install <version>,例如nvm install v16.13.0。
- 输入
- 切换Node.js版本(如果需要):
- 使用
nvm use <version>来切换到特定版本的Node.js。 - 例如,
nvm use v16.13.0。
- 使用
- 验证安装:
- 在终端输入
node -v和npm -v。 - 如果看到Node.js和npm的版本信息,说明安装成功。
nvm还允许你管理多个Node.js版本,查看已安装的版本列表(
nvm ls),设置默认版本(nvm alias default <version>),以及更多操作。使用nvm可以方便地在不同的Node.js版本之间进行切换,这对于开发和工作环境的灵活性非常有帮助。
- 在终端输入
1.2 微服务方式部署(Docker)
1.2.1 部署单机模式Nacos
要求部署版本是2.0.3
Clone 项目
git clone https://github.com/nacos-group/nacos-docker.git
cd nacos-docker
指定Nacos版本
编辑文件nacos-docker/example/.env
将版本改为:NACOS_VERSION=v2.0.3
单机模式 Derby
docker-compose -f example/standalone-derby.yaml upNacos官方部署文档: https://nacos.io/docs/v2/quickstart/quick-start-docker/ 管理
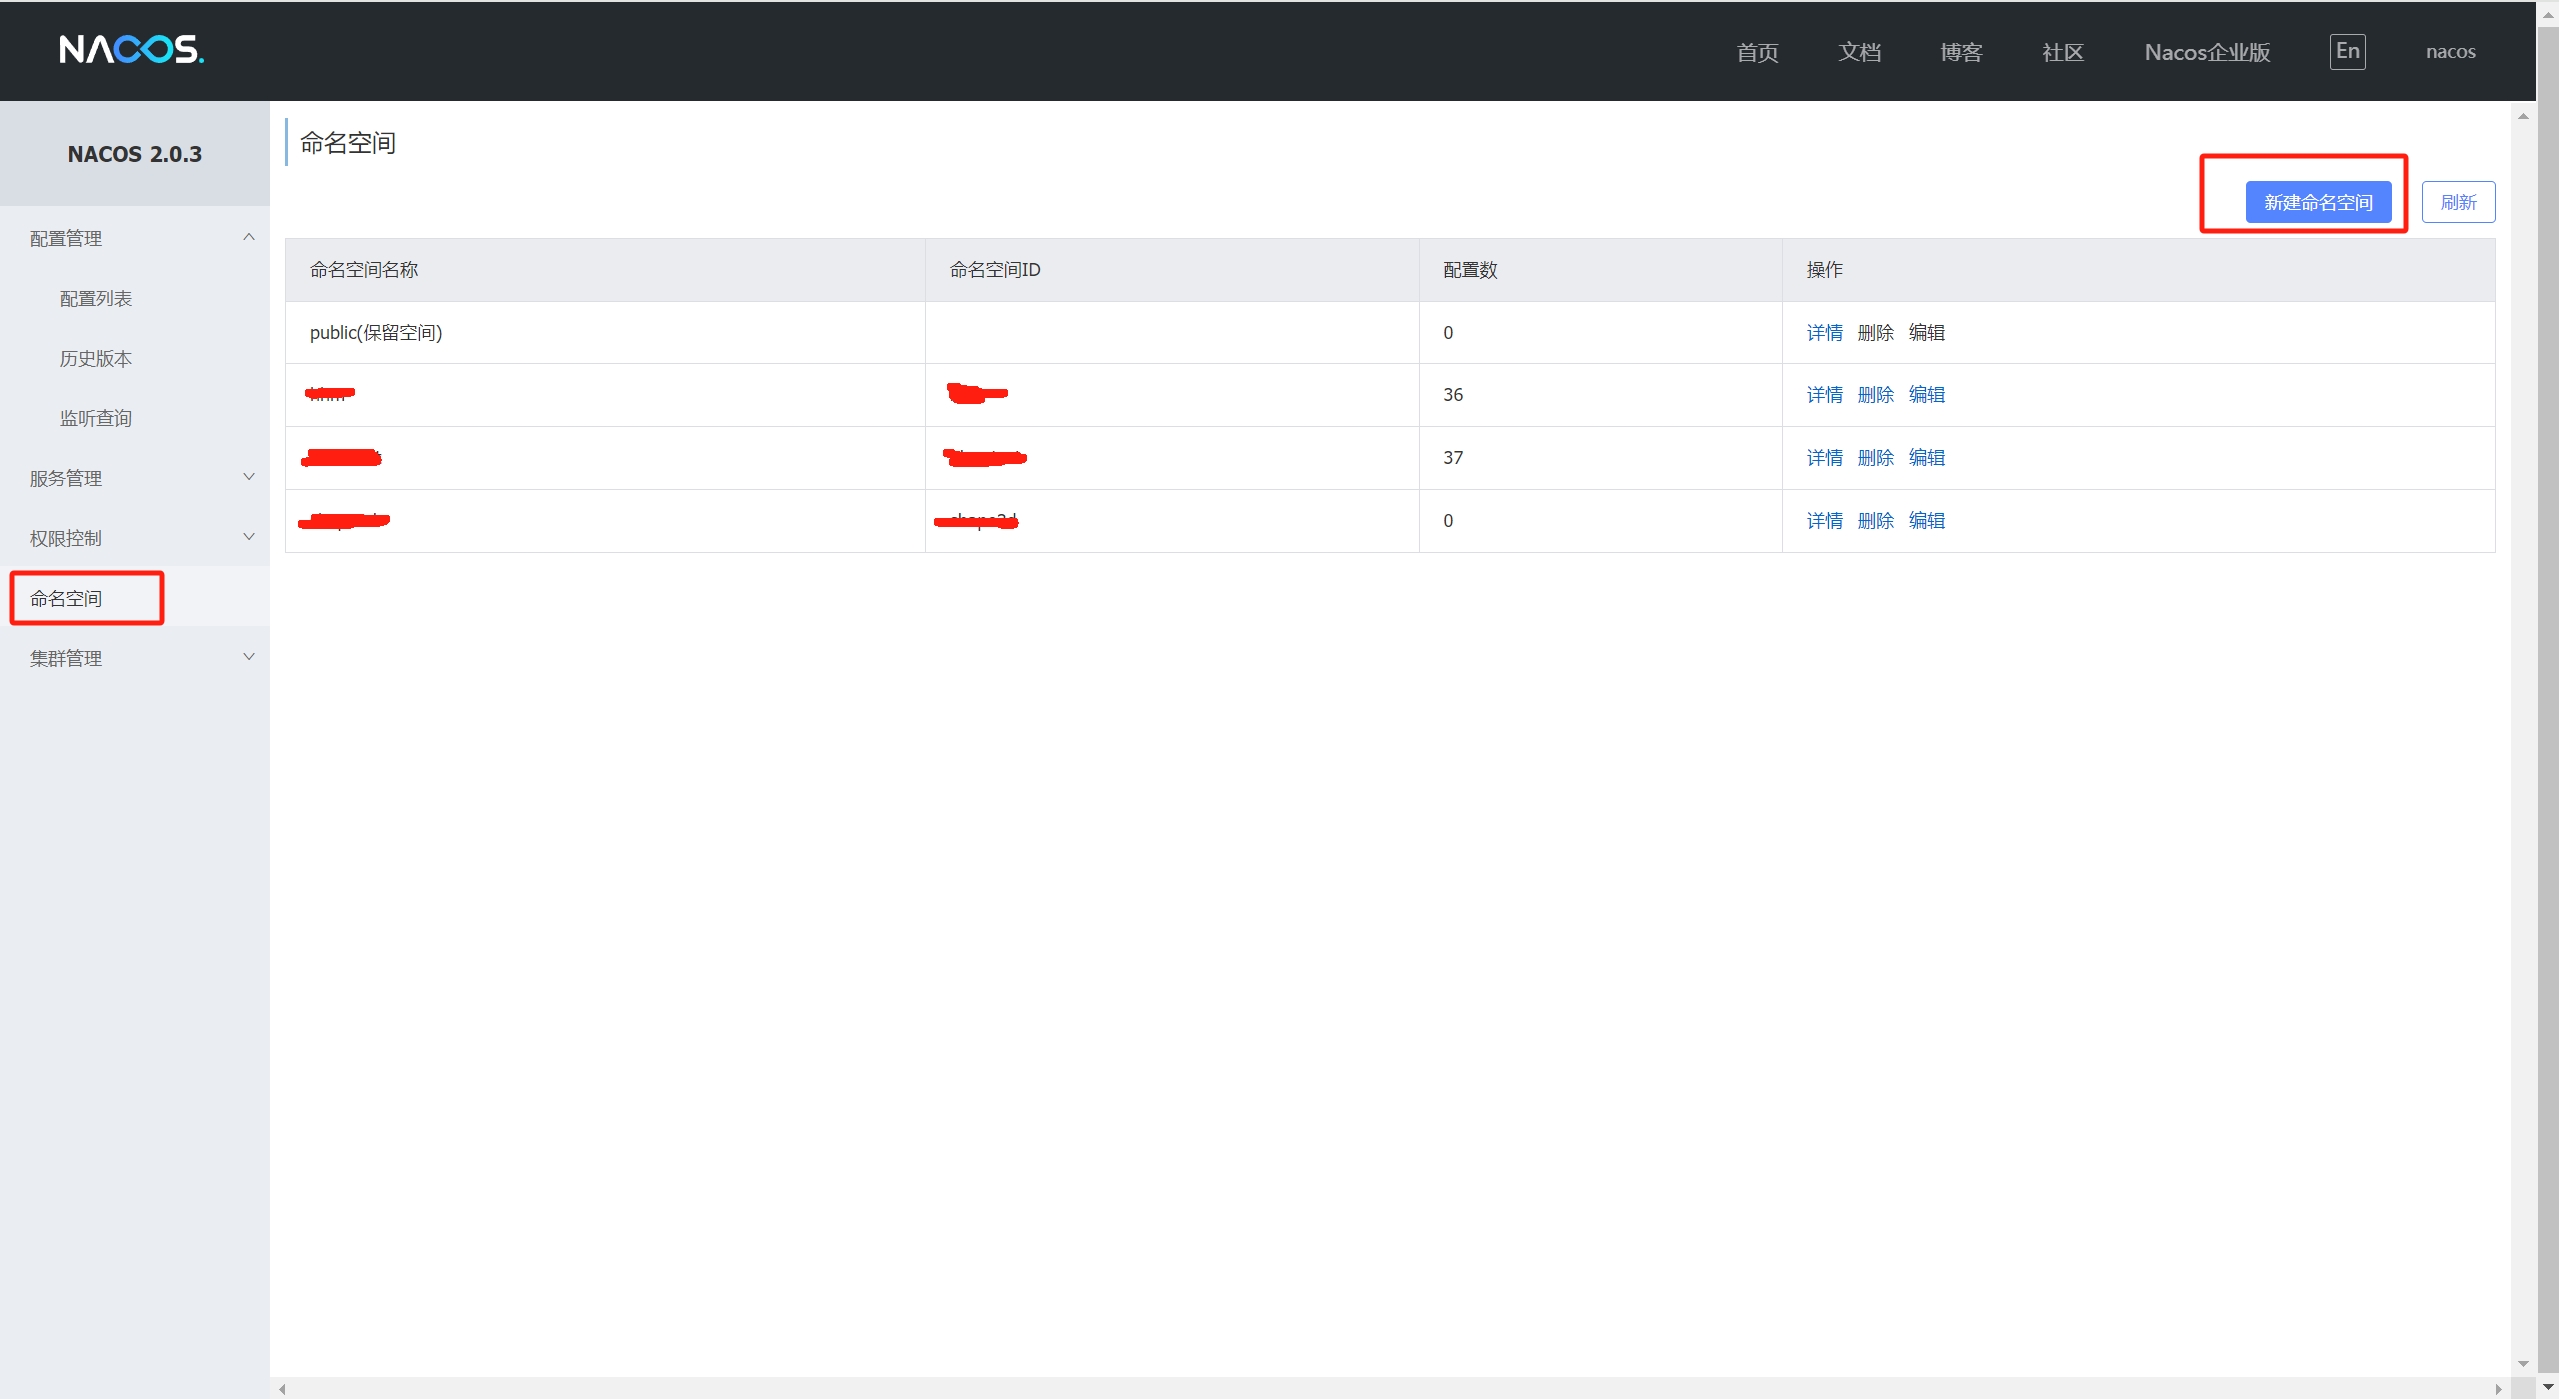
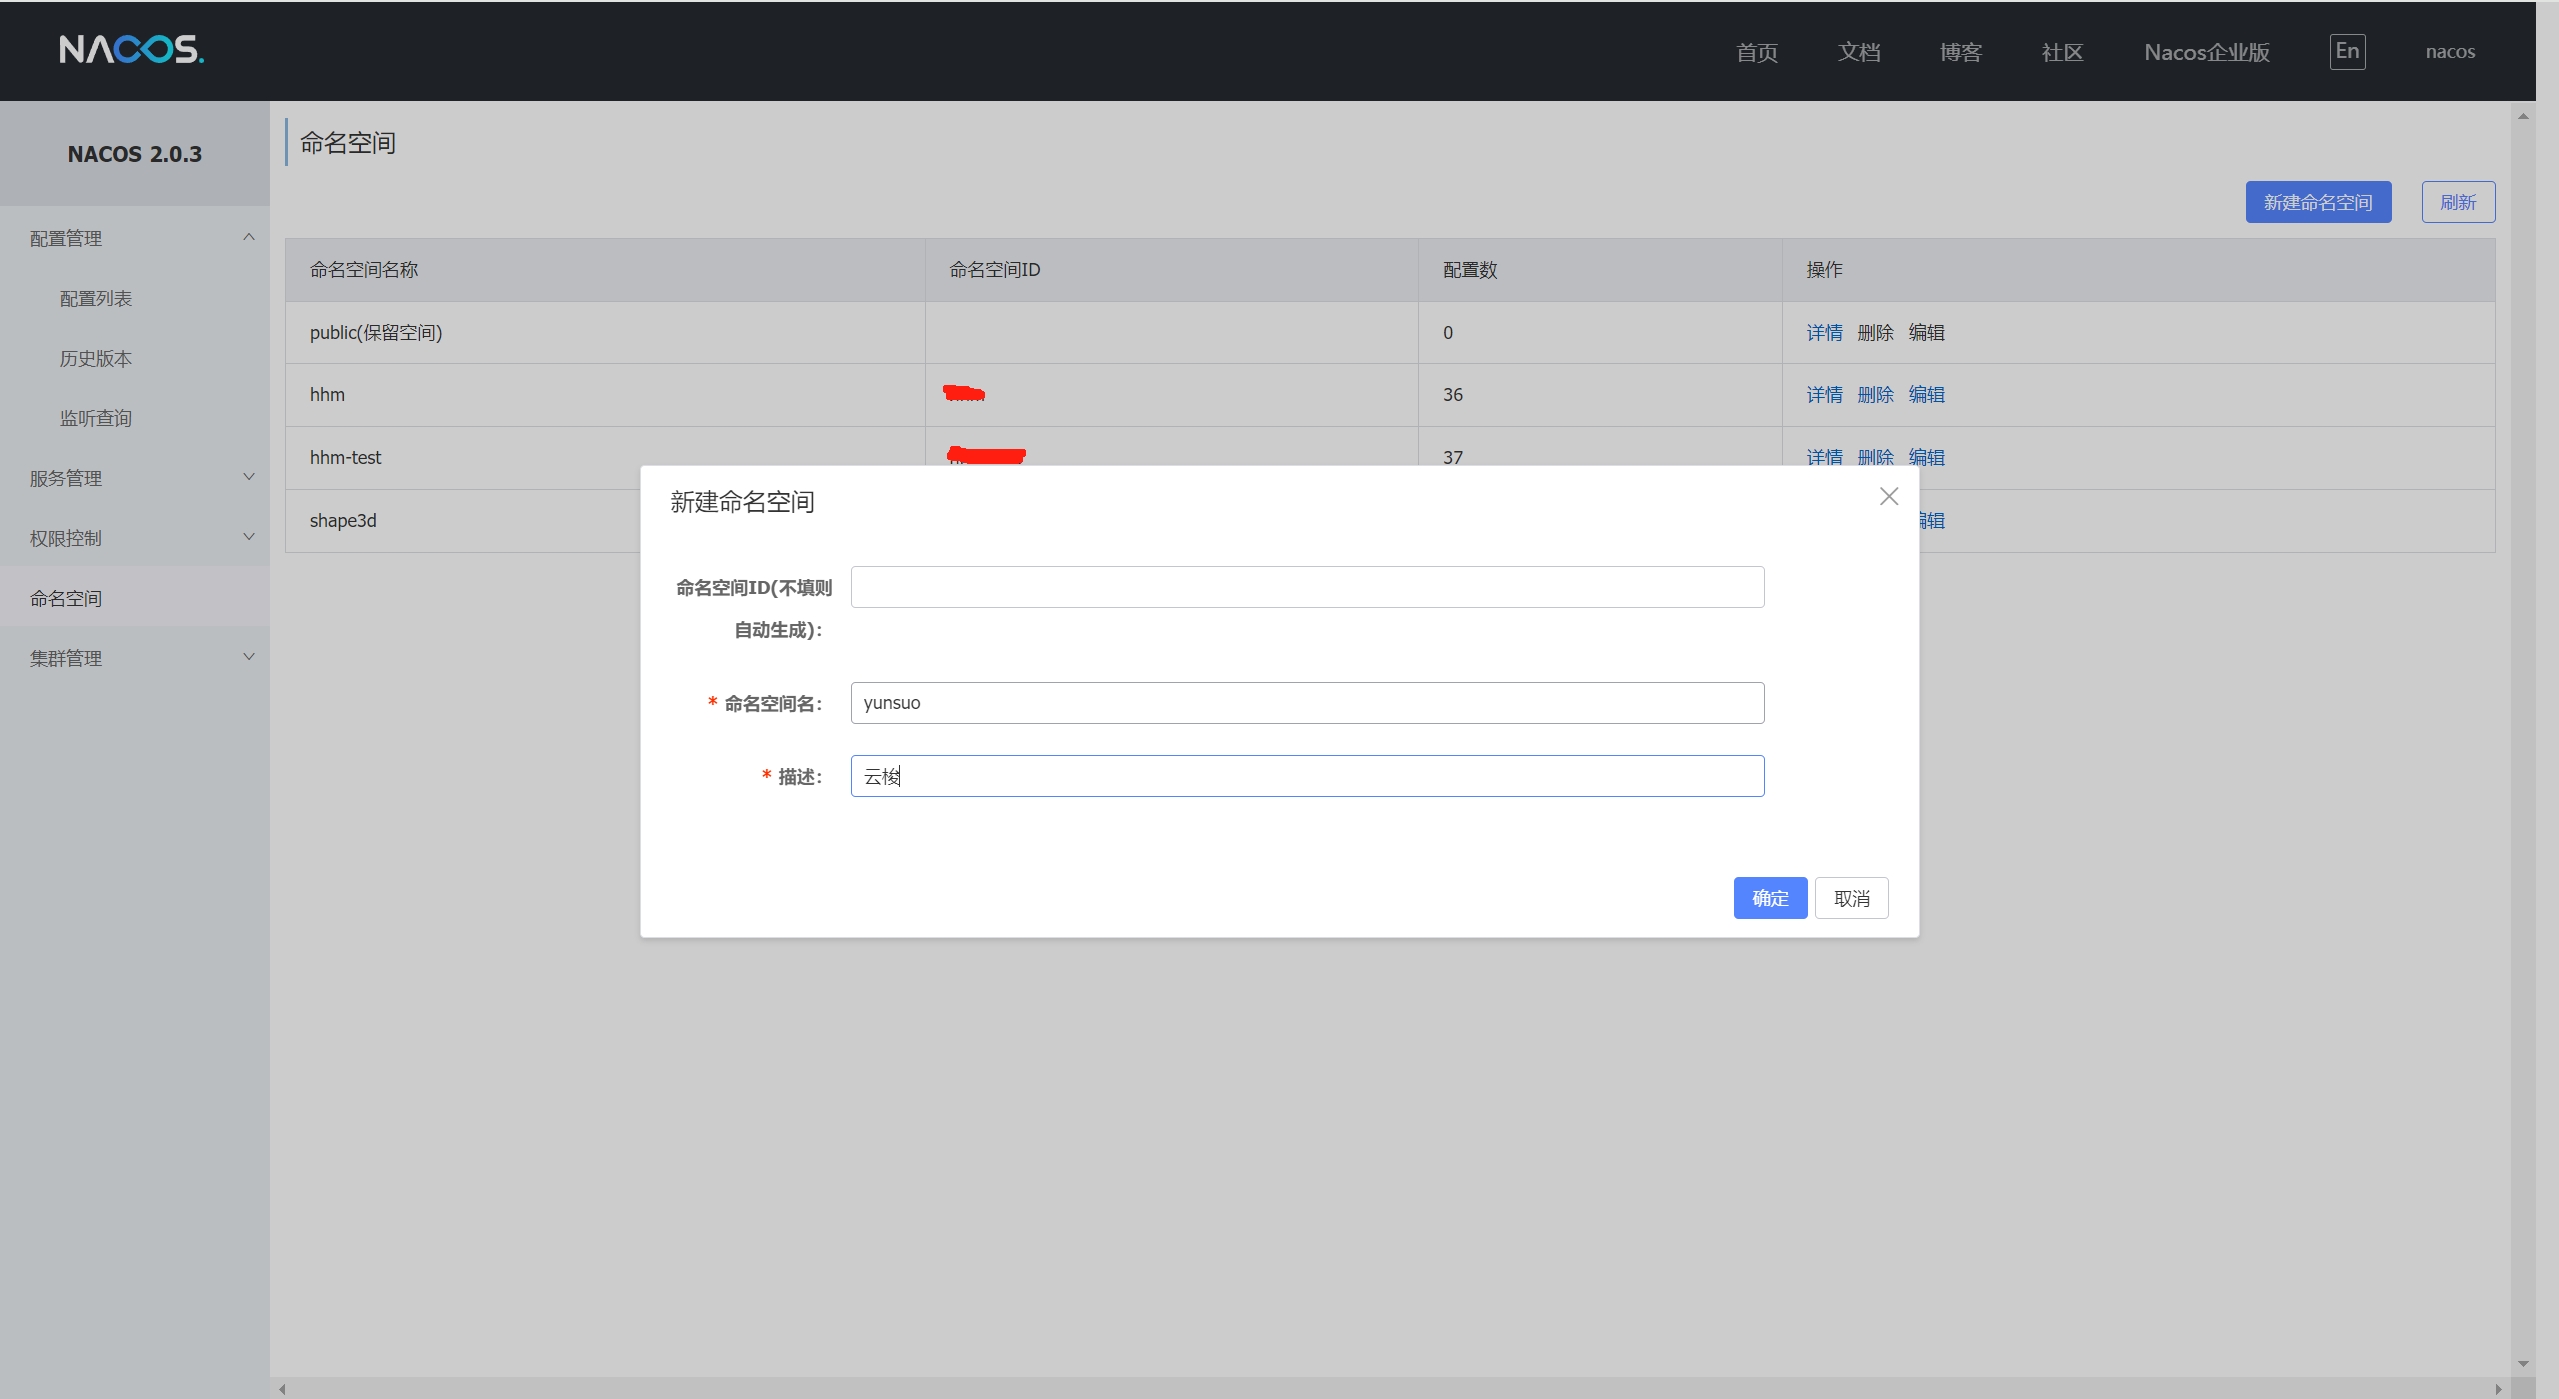
- http://127.0.0.1:8848 打开nacos web管理界面,登录进去
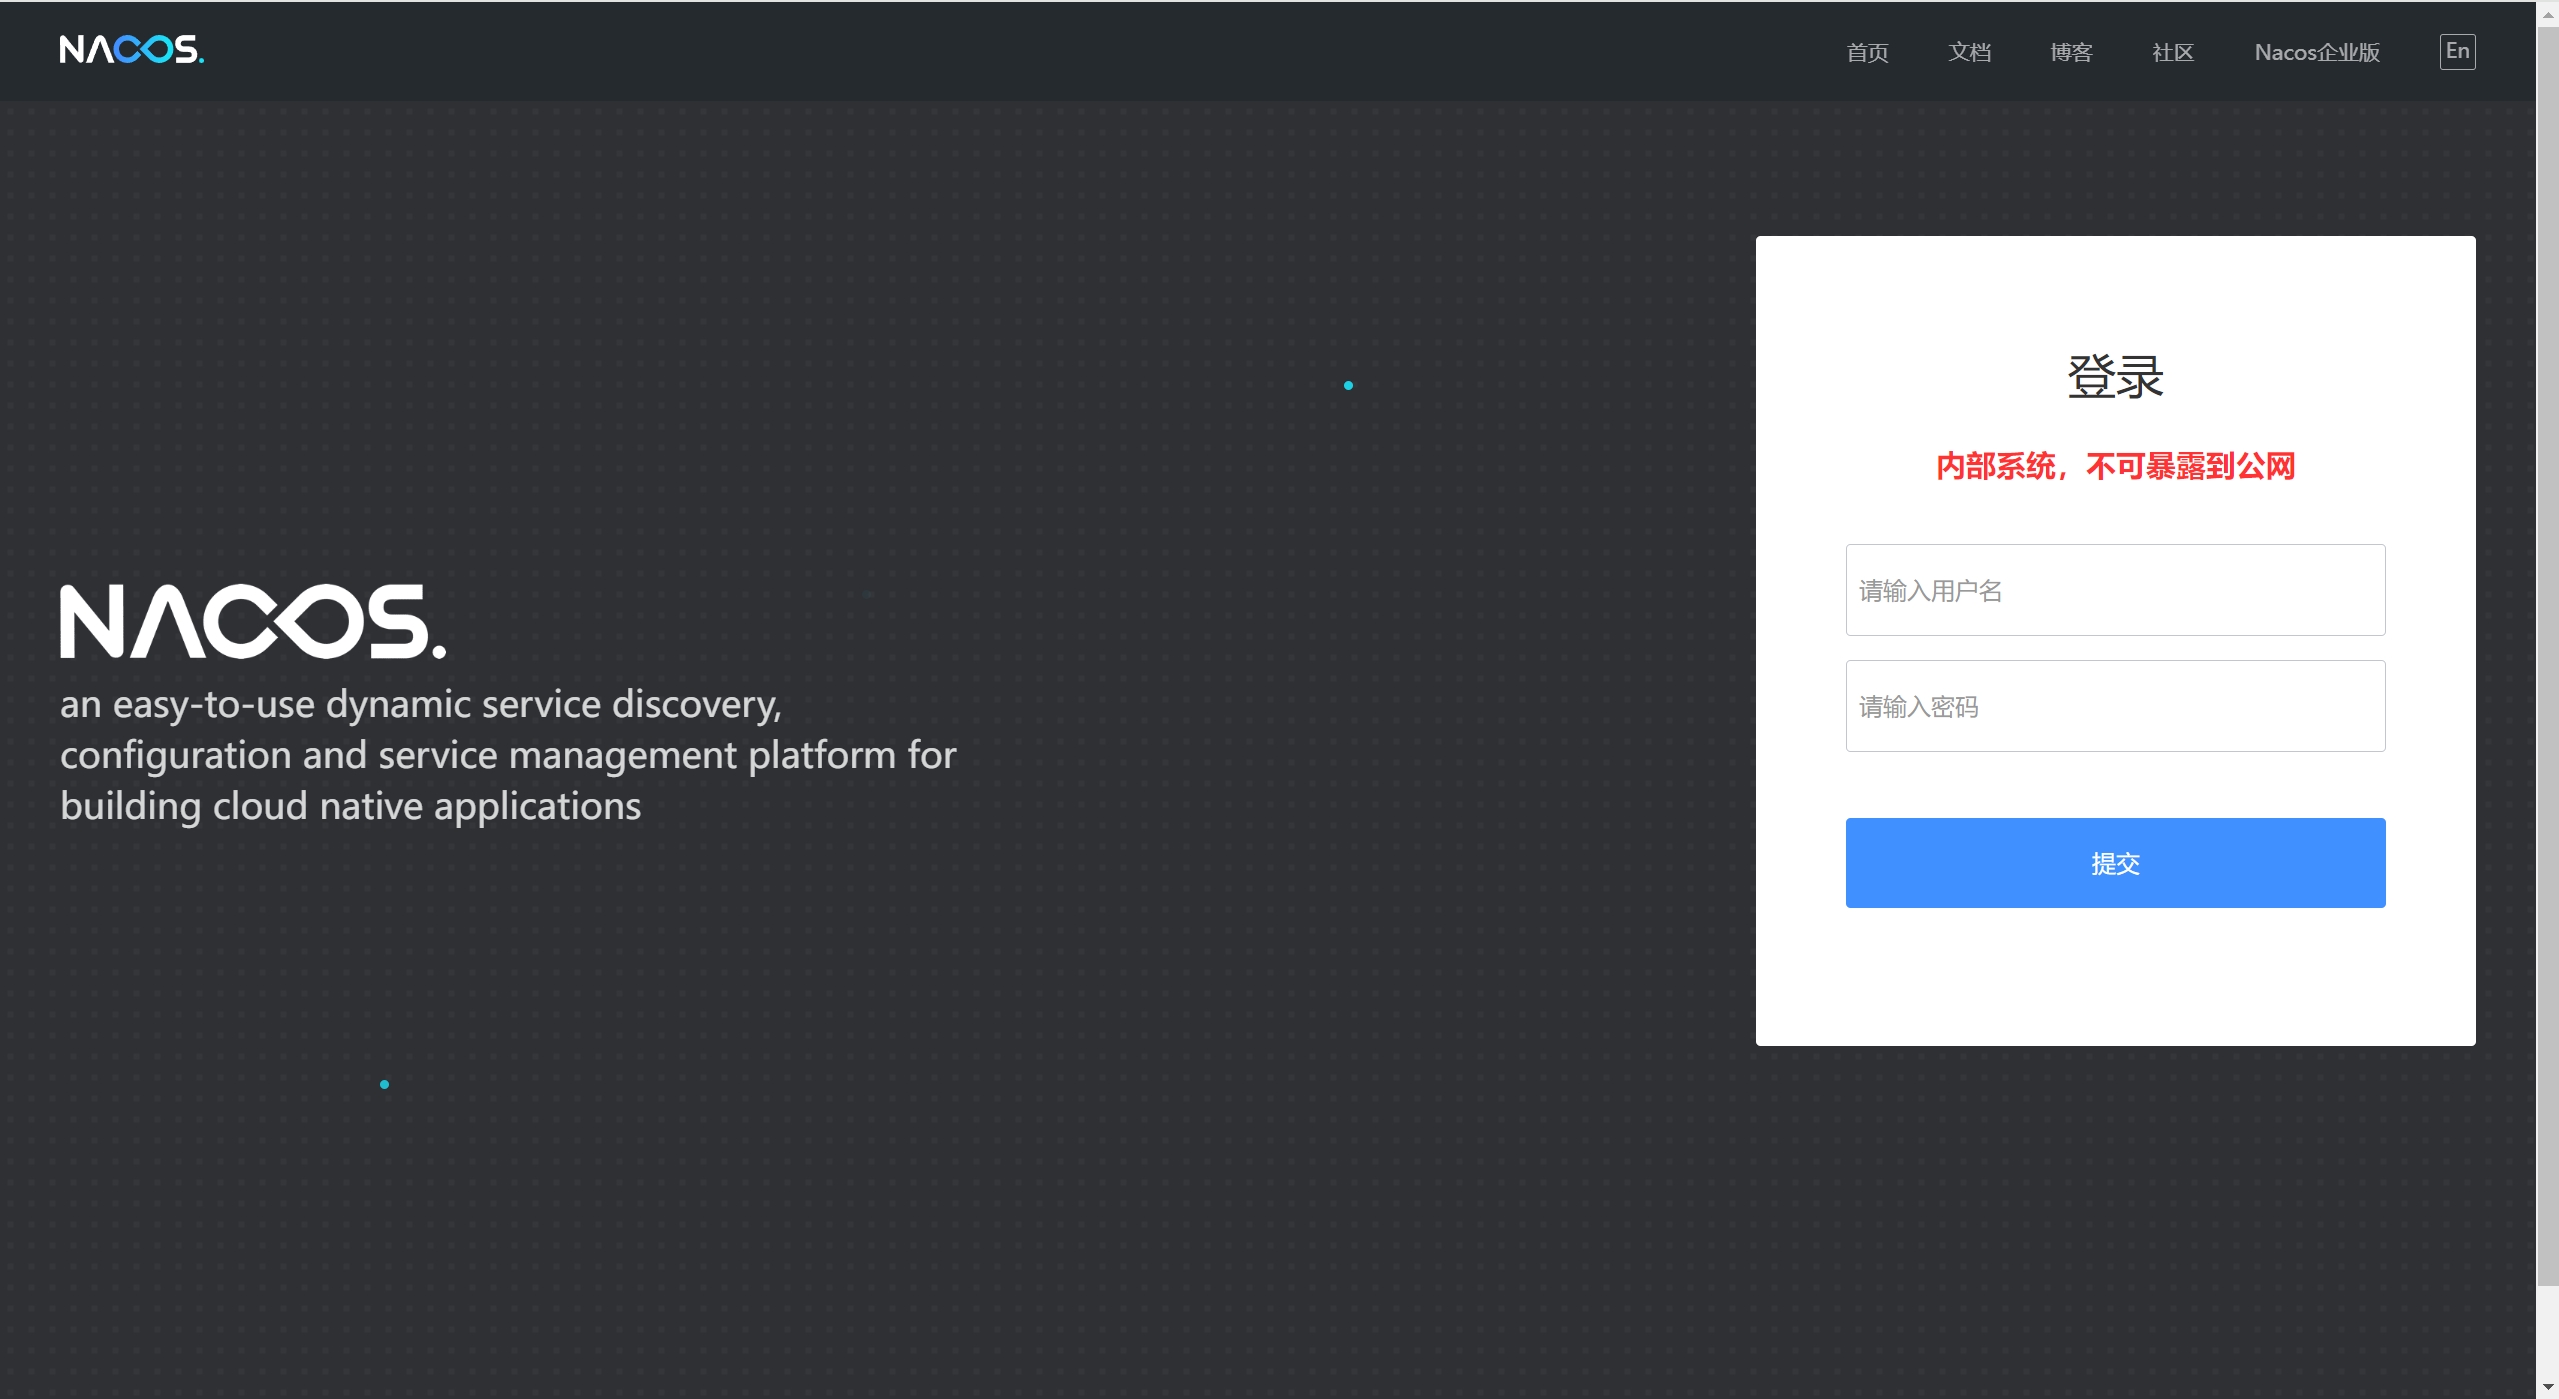
- 创建一个yunsuo命名空间
1.2.2 部署Mysql
要求部署版本是8.0.29
# 需要自己修改下mysql密码
docker run -d --name mysql -e MYSQL_ROOT_PASSWORD=password -p 3306:3306 mysql:8.0.29
初始化数据库
使用任意mysql客户端,执行 yunsuo.sql 脚本完成数据库初始化
1.2.3 部署Usercenter服务
Clone 项目
git clone https://github.com/CloudSilk/usercenter.git
cd usercenter
配置
- 在根目录下创建一个dubbogo.yaml文件,内容如下
dubbo:
  config-center:
    protocol: nacos
    address: 127.0.0.1:8848
    data-id: "usercenter"
    group: nooocode
    username: nacos
    password: password
namespace: yunsuo- 在nacos里面创建两个配置
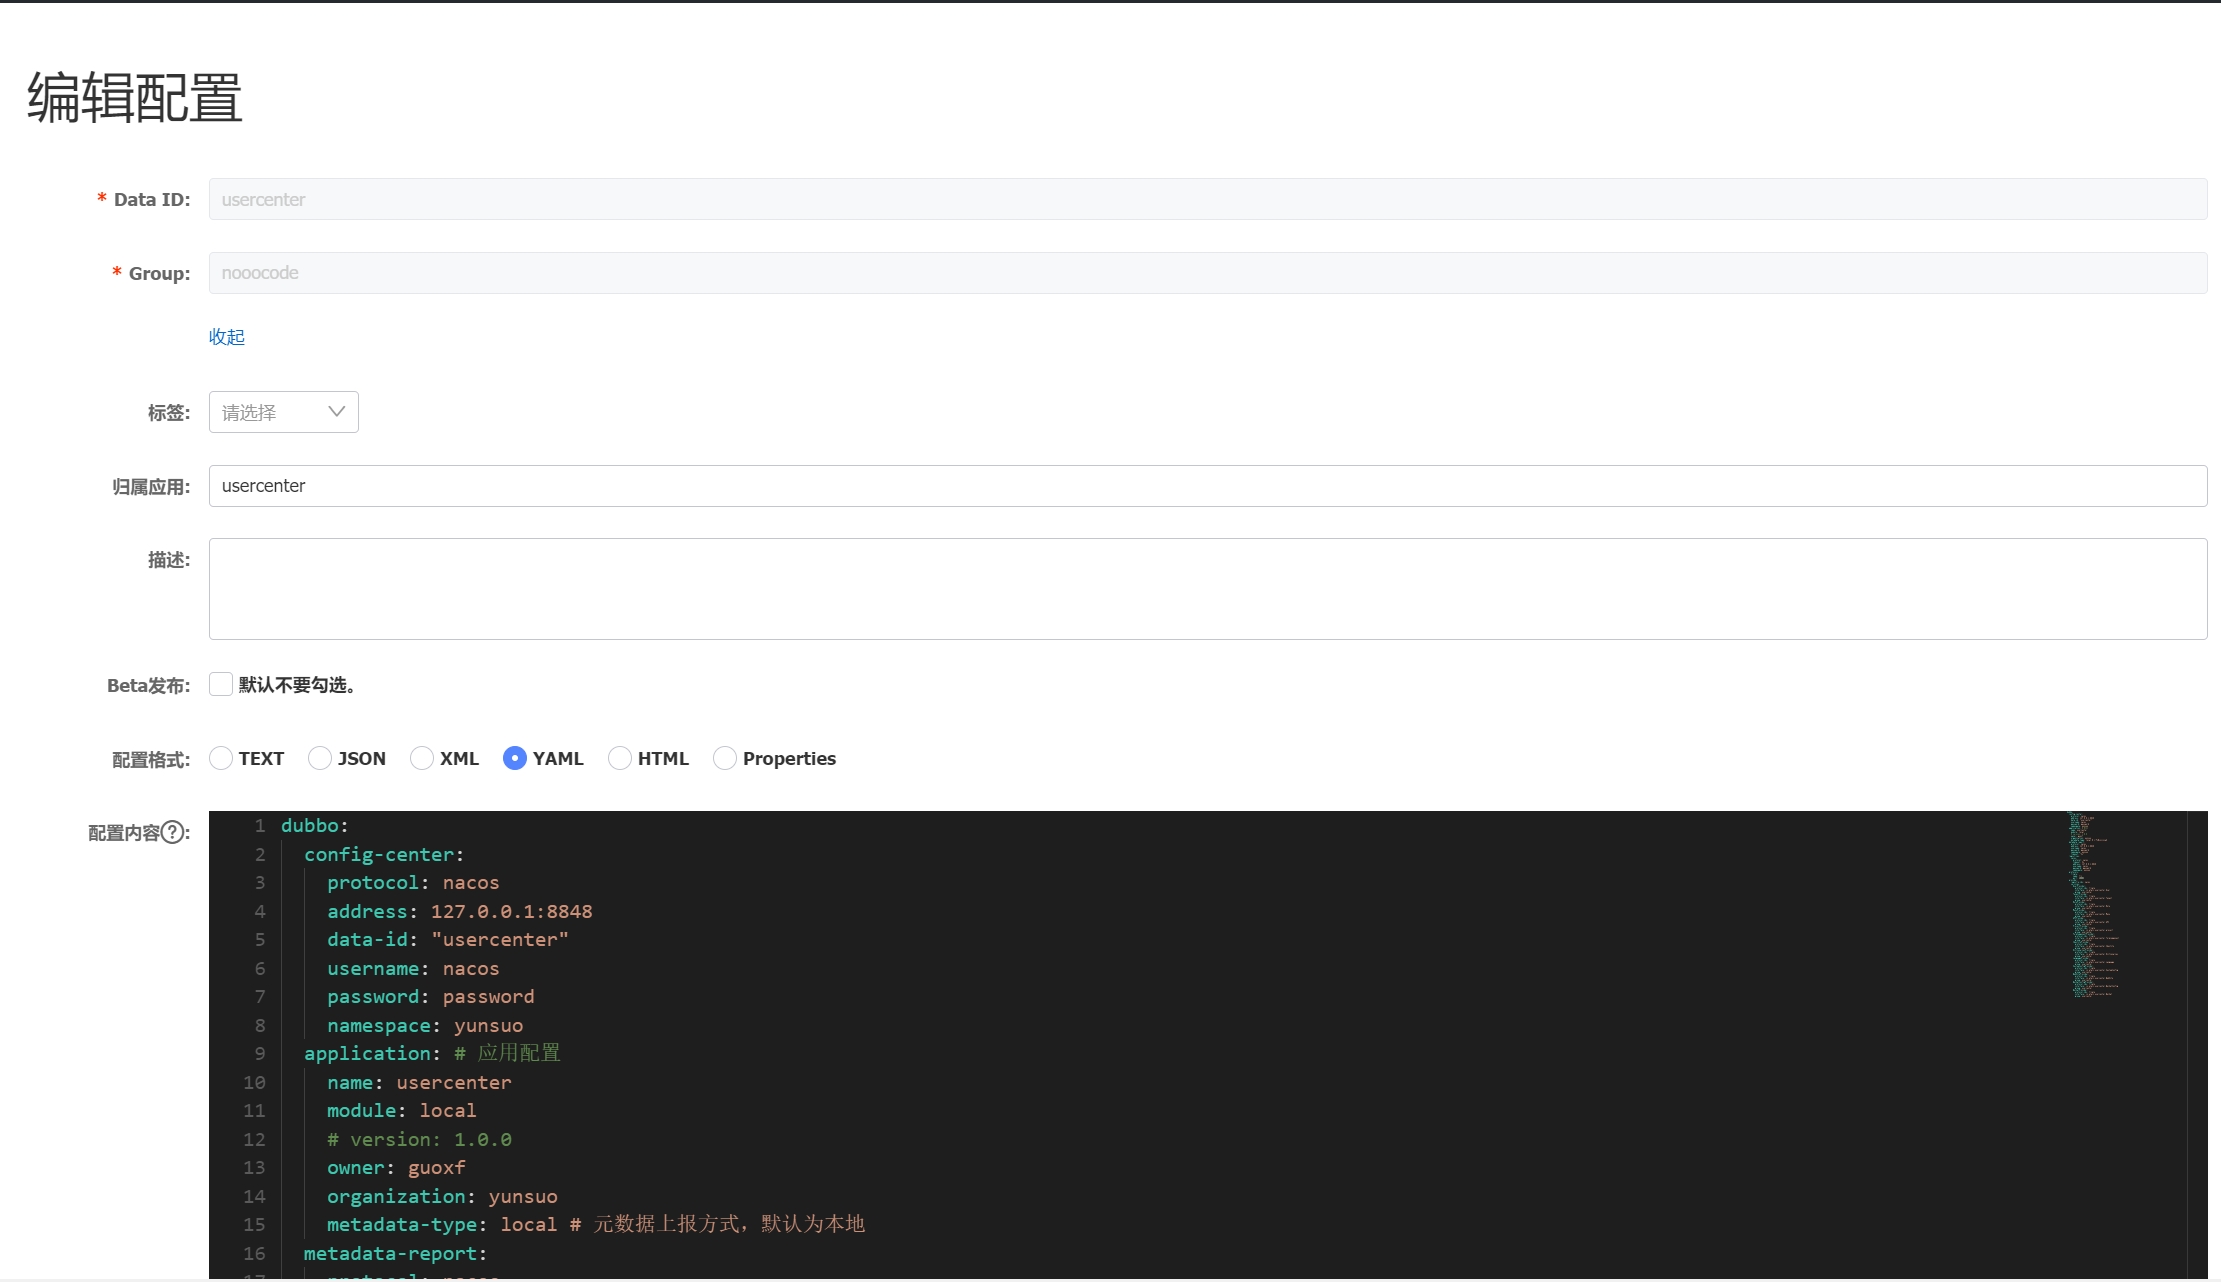
dubbo:
  config-center:
    protocol: nacos
    address: 127.0.0.1:8848
    data-id: "usercenter"
    username: nacos
    password: password
    namespace: yunsuo
  application: # 应用配置
    name: usercenter
    module: local
    # version: 1.0.0
    owner: guoxf
    organization: yunsuo
    metadata-type: local # 元数据上报方式,默认为本地
  metadata-report:
    protocol: nacos
    address: 127.0.0.1:8848
    username: nacos
    password: password
    namespace: yunsuo
    timeout: "3s"
  registries:
    nacos:
      protocol: nacos
      timeout: 3s
      address: 127.0.0.1:8848
      username: nacos
      password: password
      namespace: yunsuo
  protocols:
    triple:
      name: tri
      port: 20003
  provider:
    registry-ids: nacos
    services:
      UserProvider:
        protocol-ids: triple
        interface: cn.atali.usercenter.User
        group: usercenter
      TenantProvider:
        protocol-ids: triple
        interface: cn.atali.usercenter.Tenant
        group: usercenter
      RoleProvider:
        protocol-ids: triple
        interface: cn.atali.usercenter.Role
        group: usercenter
      MenuProvider:
        protocol-ids: triple
        interface: cn.atali.usercenter.Menu
        group: usercenter
      APIProvider:
        protocol-ids: triple
        interface: cn.atali.usercenter.API
        group: usercenter
      ProjectProvider:
        protocol-ids: triple
        interface: cn.atali.usercenter.project
        group: usercenter
      FormComponentProvider:
        protocol-ids: triple
        interface: cn.atali.usercenter.formcomponent
        group: usercenter
      IdentityProvider:
        protocol-ids: triple
        interface: cn.atali.usercenter.Identity
        group: usercenter
      DictionariesProvider:
        protocol-ids: triple
        interface: cn.atali.usercenter.Dictionaries
        group: usercenter
      LanguageProvider:
        protocol-ids: triple
        interface: cn.atali.usercenter.Language
        group: usercenter
      SystemConfigProvider:
        protocol-ids: triple
        interface: cn.atali.usercenter.SystemConfig
        group: usercenter
      WebSiteProvider:
        protocol-ids: triple
        interface: cn.atali.usercenter.WebSite
        group: usercenter
      WechatConfigProvider:
        protocol-ids: triple
        interface: cn.atali.usercenter.WechatConfig
        group: usercenter
      WechatProvider:
        protocol-ids: triple
        interface: cn.atali.usercenter.Wechat
        group: usercenter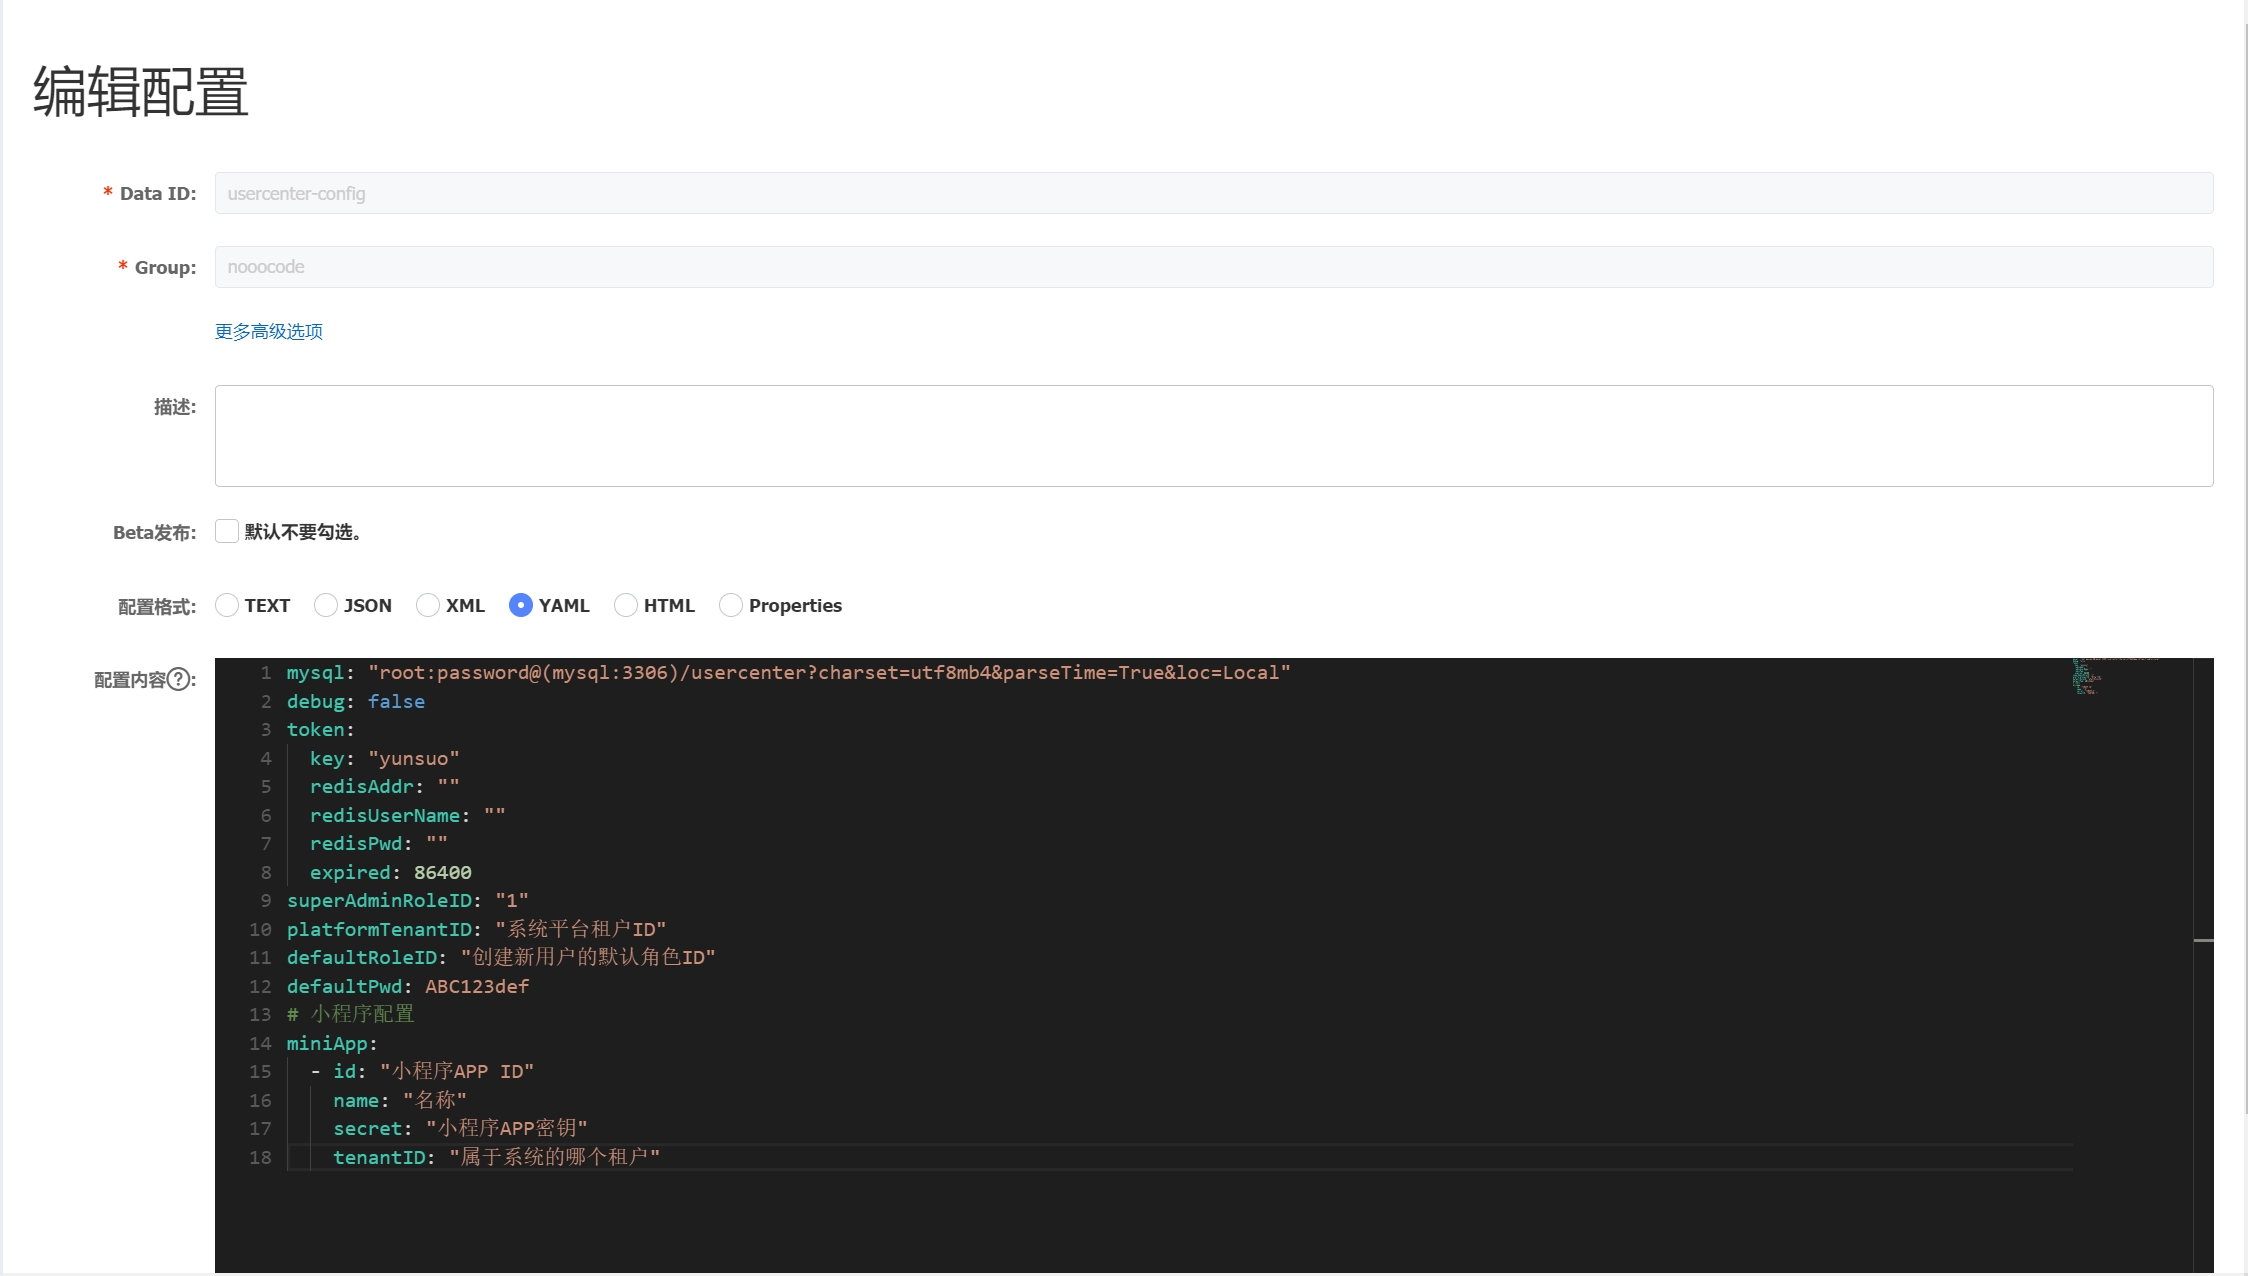
mysql: "root:password@(mysql:3306)/usercenter?charset=utf8mb4&parseTime=True&loc=Local"
debug: false
token:
  key: "yunsuo"
  redisAddr: ""
  redisUserName: ""
  redisPwd: ""
  expired: 86400
superAdminRoleID: "1"
platformTenantID: "系统平台租户ID"
defaultRoleID: "创建新用户的默认角色ID"
defaultPwd: ABC123def
# 小程序配置
miniApp:
  - id: "小程序APP ID"
    name: "名称"
    secret: "小程序APP密钥"
    tenantID: "属于系统的哪个租户"
编译打包
# 修改镜像版本号 v1.0.0
docker build -f Dockerfile -t nooocode/usercenter:v1.0.0 .
启动服务
docker run -d --name usercenter -e DUBBO_GO_CONFIG_PATH="./dubbogo.yaml" -p 48080:48080 -p 20003:20003 nooocode/usercenter:v1.0.01.2.4 部署Curd服务
Clone 项目
git clone https://github.com/CloudSilk/curd.git
cd curd
配置
- 在根目录下创建一个dubbogo.yaml文件,内容如下
dubbo:
  config-center:
    protocol: nacos
    address: 127.0.0.1:8848
    data-id: "curd"
    group: nooocode
    username: nacos
    password: password
namespace: yunsuo- 在nacos里面创建一个配置
dubbo:
  config-center:
    protocol: nacos
    address: 127.0.0.1:8848
    data-id: "curd"
    username: nacos
    password: password
    namespace: yunsuo
    params:
      mysql: "root:password@(127.0.0.1:3306)/usercenter?charset=utf8mb4&parseTime=True&loc=Local"
      debug: "true"
      platformTenantID: "平台租户ID"
  registries:
    nacos:
      protocol: nacos
      timeout: 3s
      address: 127.0.0.1:8848
      username: nacos
      password: password
      namespace: yunsuo
  protocols:
    triple:
      name: tri
      port: 20005
  provider:
    registry-ids: nacos
    services:
      PageProvider:
        protocol-ids: triple
        interface: cn.atali.curd.Page
        group: curd
      MetadataProvider:
        protocol-ids: triple
        interface: cn.atali.curd.Metadata
        group: curd
  consumer:
    references:
      IdentityClientImpl:
        protocol: tri
        interface: cn.atali.usercenter.Identity
        group: usercenter
      ProjectClientImpl:
        protocol: tri
        interface: cn.atali.usercenter.project
        group: usercenter
      FormComponentClientImpl:
        protocol: tri
        interface: cn.atali.usercenter.formcomponent
        group: usercenter
编译打包
# 修改镜像版本号 v1.0.0
docker build -f Dockerfile -t nooocode/curd:v1.0.0 .
启动服务
docker run -d --name curd -e DUBBO_GO_CONFIG_PATH="./dubbogo.yaml" -p 48081:48081 -p 20005:20005 nooocode/curd:v1.0.01.2.5 部署CloudSilk服务
Clone 项目
git clone https://github.com/CloudSilk/CloudSilk.git
cd CloudSilk
配置
- 在根目录下创建一个dubbogo.yaml文件,内容如下
dubbo:
  config-center:
    protocol: nacos
    address: 127.0.0.1:8848
    data-id: "CloudSilk"
    group: CloudSilk
    username: nacos
    password: password
namespace: yunsuo- 在nacos里面创建一个配置
dubbo:
  config-center:
    protocol: nacos
    address: 127.0.0.1:8848
    data-id: "CloudSilk"
    username: nacos
    password: password
    namespace: yunsuo
    params:
      mysql: "root:password@(127.0.0.1:3306)/CloudSilk?charset=utf8mb4&parseTime=True&loc=Local"
      debug: "true"
      platformTenantID: "平台租户ID"
  registries:
    nacos:
      protocol: nacos
      timeout: 3s
      address: 127.0.0.1:8848
      username: nacos
      password: password
      namespace: yunsuo
  protocols:
    triple:
      name: tri
      port: 21000
  provider:
    services:
      ProductionStationProvider:
        interface: "ProductionStation"
      ProductionStationSignupProvider:
        interface: "ProductionStationSignup"
      ProductionLineProvider:
        interface: "ProductionLine"
      ProductAttributeProvider:
        interface: "ProductAttribute"
      ProductionCrosswayProvider:
        interface: "ProductionCrossway"
      MaterialTrayProvider:
        interface: "MaterialTray"
      ProductPackageRecordProvider:
        interface: "ProductPackageRecord"
      ProductInfoProvider:
        interface: "ProductInfo"
      ProductOrderProvider:
        interface: "ProductOrder"
      ProductRhythmRecordProvider:
        interface: "ProductRhythmRecord"
      ProductProcessRouteProvider:
        interface: "ProductProcessRoute"
      ProductionProcessProvider:
        interface: "ProductionProcess"
      ProductionProcessSopProvider:
        interface: "ProductionProcessSop"
      ProductModelProvider:
        interface: "ProductModel"
      PersonnelQualificationProvider:
        interface: "PersonnelQualification"
      SystemEventProvider:
        interface: "SystemEvent"
      SystemEventTriggerProvider:
        interface: "SystemEventTrigger"
      SystemEventTriggerParameterProvider:
        interface: "SystemEventTriggerParameter"
      ProductReworkRecordProvider:
        interface: "ProductReworkRecord"
      ProductOrderProcessProvider:
        interface: "ProductOrderProcess"
      ProductionStationOutputProvider:
        interface: "ProductionStationOutput"
      ProductOrderAttributeProvider:
        interface: "ProductOrderAttribute"
      ProcessStepMatchRuleProvider:
        interface: "ProcessStepMatchRule"
      ProductionProcessStepProvider:
        interface: "ProductionProcessStep"
      ProductTestRecordProvider:
        interface: "ProductTestRecord"
  consumer:
    references:
      IdentityClientImpl:
        protocol: tri
        interface: cn.atali.usercenter.Identity
        group: usercenter
      UserClientImpl:
        protocol: tri
        interface: cn.atali.usercenter.User
        group: usercenter
      ProductionStationClientImpl:
        protocol: tri
        url: "tri://localhost:20000"
        interface: "ProductionStation"
      ProductionStationSignupClientImpl:
        protocol: tri
        url: "tri://localhost:20000"
        interface: "ProductionStationSignup"
      ProductionLineClientImpl:
        protocol: tri
        url: "tri://localhost:20000"
        interface: "ProductionLine"
      ProductAttributeClientImpl:
        protocol: tri
        url: "tri://localhost:20000"
        interface: "ProductAttribute"
      ProductionCrosswayClientImpl:
        protocol: tri
        url: "tri://localhost:20000"
        interface: "ProductionCrossway"
      MaterialTrayClientImpl:
        protocol: tri
        url: "tri://localhost:20000"
        interface: "MaterialTray"
      ProductPackageRecordClientImpl:
        protocol: tri
        url: "tri://localhost:20000"
        interface: "ProductPackageRecord"
      ProductInfoClientImpl:
        protocol: tri
        url: "tri://localhost:20000"
        interface: "ProductInfo"
      ProductOrderClientImpl:
        protocol: tri
        url: "tri://localhost:20000"
        interface: "ProductOrder"
      ProductRhythmRecordClientImpl:
        protocol: tri
        url: "tri://localhost:20000"
        interface: "ProductRhythmRecord"
      ProductProcessRouteClientImpl:
        protocol: tri
        url: "tri://localhost:20000"
        interface: "ProductProcessRoute"
      ProductionProcessClientImpl:
        protocol: tri
        url: "tri://localhost:20000"
        interface: "ProductionProcess"
      ProductionProcessSopClientImpl:
        protocol: tri
        url: "tri://localhost:20000"
        interface: "ProductionProcessSop"
      ProductModelClientImpl:
        protocol: tri
        url: "tri://localhost:20000"
        interface: "ProductModel"
      PersonnelQualificationClientImpl:
        protocol: tri
        url: "tri://localhost:20000"
        interface: "PersonnelQualification"
      SystemEventClientImpl:
        protocol: tri
        url: "tri://localhost:20000"
        interface: "SystemEvent"
      SystemEventTriggerClientImpl:
        protocol: tri
        url: "tri://localhost:20000"
        interface: "SystemEventTrigger"
      SystemEventTriggerParameterClientImpl:
        protocol: tri
        url: "tri://localhost:20000"
        interface: "SystemEventTriggerParameter"
      ProductReworkRecordClientImpl:
        protocol: tri
        url: "tri://localhost:20000"
        interface: "ProductReworkRecord"
      ProductOrderProcessClientImpl:
        protocol: tri
        url: "tri://localhost:20000"
        interface: "ProductOrderProcess"
      ProductionStationOutputClientImpl:
        protocol: tri
        url: "tri://localhost:20000"
        interface: "ProductionStationOutput"
      ProductOrderAttributeClientImpl:
        protocol: tri
        url: "tri://localhost:20000"
        interface: "ProductOrderAttribute"
      ProcessStepMatchRuleClientImpl:
        protocol: tri
        url: "tri://localhost:20000"
        interface: "ProcessStepMatchRule"
      ProductionProcessStepClientImpl:
        protocol: tri
        url: "tri://localhost:20000"
        interface: "ProductionProcessStep"
      ProductTestRecordClientImpl:
        protocol: tri
        url: "tri://localhost:20000"
        interface: "ProductTestRecord"
编译打包
# 修改镜像版本号 v1.0.0
docker build -f Dockerfile -t CloudSilk/CloudSilk:v1.0.0 .
启动服务
docker run -d --name CloudSilk -e DUBBO_GO_CONFIG_PATH="./dubbogo.yaml" -p 48900:48900 -p 21000:21000 CloudSilk/CloudSilk:v1.0.01.2.6 部署前端
Clone 项目
git clone https://github.com/CloudSilk/CloudSilk.git
cd CloudSilk/web
修改nginx配置
server {
    listen 80;
    server_name _;
    # 指向 usercenter 服务
    location /api/core {
      proxy_pass http://127.0.0.1:48080;
    }
    # 指向 curd 服务
    location /api/curd {
      proxy_pass http://127.0.0.1:48081;
    }
    location /api/form {
      proxy_pass http://127.0.0.1:48081;
    }
    # 指向 mom 服务
    location /api/mom {
      proxy_pass http://127.0.0.1:48900;
    }
    # 指向 CloudSilk-Web 服务
    location / {
      root html;
      index  index.html index.htm;
    }
}
编译打包
# 修改镜像版本号 v1.0.0
docker build -f Dockerfile -t CloudSilk/CloudSilk-Web:v1.0.0 .
启动服务
docker run -d --name CloudSilk-Web -p 80:80 CloudSilk/CloudSilk-Web:v1.0.0打开浏览器输入http://127.0.0.1
默认账号:admin
默认密码:ABC123def
1.3 单服务部署方式
接下来
探索这些文档以便添加更多内容:
最后更新于